A garden pond is a great way to enhance your outdoor space, creating a peaceful retreat while attracting diverse wildlife. Whether for aesthetic appeal or supporting local fauna, a small pond can transform your garden into a mini paradise. Follow these 5 simple steps to build your own!

🌿 Step 1: Mark Out the Pond Area
Before digging, carefully plan the size and shape of your pond. Consider:
✔ Location – Choose a spot that balances sun and shade (about ⅔ sun, ⅓ shade).
✔ Depth – Aim for at least 80 cm (or 1 meter in colder regions) to protect plants and wildlife.
✔ Proximity to trees – Avoid placing the pond too close to large trees, as falling leaves can cause issues.
📏 How to Mark the Pond:
✔ Use string and stakes to outline the area.
✔ Clear and clean the ground, removing weeds and debris.
✔ Dig a shallow layer (~20 cm deep) to set a base for excavation.
💡 Example: For a 25m² square pond, mark out a 6.5m × 6.5m square, then create a smaller 5m × 5m square inside it.
⛏️ Step 2: Dig the Pond
Now, it’s time to start digging! The best pond location is a low-lying area that naturally collects rainwater.
🔹 Digging Tips:
✔ Ensure the ground is flat, dry, and free of stones.
✔ Maintain a gradual slope for easy drainage.
✔ Position the pond away from falling leaves to minimize maintenance.
✔ Plan for a water inlet and drainage pipe at opposite ends of the pond.
💧 Step 3: Waterproof the Pond Bottom
To prevent water from leaking, you’ll need to waterproof the base.
🔹 How to Waterproof:
✔ Spread 5 cm of damp sand across the entire surface.
✔ Cover with a geotextile fabric (cut to the pond’s size and depth).
✔ Add a 2mm thick PVC liner for extra protection.
✔ Cover with a layer of soil to hold it in place.
✔ Once the pond is filled, use stones around the edges to keep the liner secure.
🚰 Step 4: Install Water Supply & Drainage
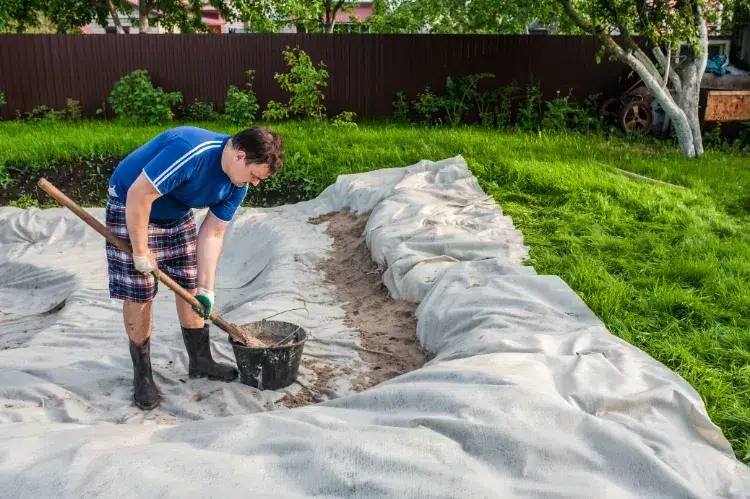
A rainwater collector is an eco-friendly way to keep your pond filled.
🔹 Setting Up the Water Supply:
✔ Connect a rainwater collector to a PVC pipe leading into the pond.
✔ Place the pipe at the higher end of the pond for proper flow.
🔹 Drainage Installation:
✔ Create a drain hole at the lowest point of the pond.
✔ Insert a drain pipe and cover with soil.
✔ Use a special plug or cloth-wrapped wood to block the pipe when needed.
🌊 Step 5: Fill & Finalize Your Pond
You’re almost there! The final step is to slowly fill the pond with water.
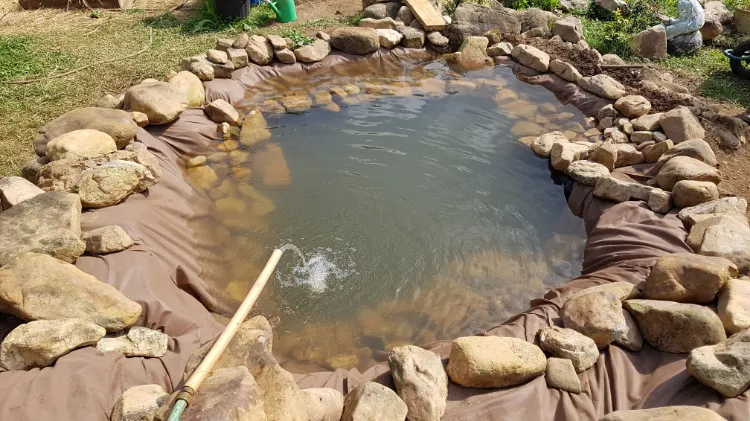
💡 Best Water Source? Collected rainwater is ideal—it’s natural and chemical-free!
✔ Fill gradually to avoid disturbing the liner.
✔ Add aquatic plants for natural filtration.
✔ Let the pond settle before introducing fish or wildlife.
🎯 Final Tips for a Beautiful Garden Pond
✔ Choose the right plants – Water lilies, reeds, and oxygenating plants keep water clean.
✔ Maintain the pond – Remove debris and monitor water levels.
✔ Encourage biodiversity – Birds, frogs, and insects will thrive in your new eco-friendly water feature!
With these simple steps, you can enjoy a serene, self-sustaining garden pond all year round! 🌿💦