Clematis is celebrated as one of the most beautiful climbers, but it can also be quite capricious and demanding. Providing it with a solid start is crucial for it to thrive and elegantly cover your pergola or outdoor staircase. It can even flourish in a pot, trained against a wall. Ready to learn how to take a clematis cutting? Follow this comprehensive guide!

When and How to Take a Clematis Cutting: 5 Steps
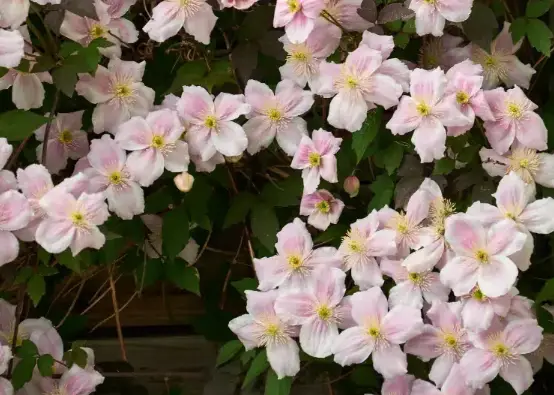
Taking cuttings from your clematis will allow you to propagate multiple plants of this beloved species. While some cuttings can be done in November, the best time for clematis cuttings is in late spring or early summer (specifically, June or July). Start when the flowers have faded and are about to bear fruit.
Step 1: Preparing the Pot
Since you won’t be planting the cutting directly in the ground, it’s essential to prepare the pot that will house your clematis cutting. This makes it easier to monitor its development and recovery. For multiple cuttings, prepare several pots:
- Use a small terracotta pot with at least one large hole for drainage.
- Add small gravel to the bottom for drainage.
- Fill the pot with special cutting soil.
Step 2: Taking the Cutting

Choose a clematis that has been well-established for at least two years. Here’s how to take the cutting:
- Select a healthy stem that is free from stains or insects.
- Choose a softwood lateral stem or secondary branch that has started to lignify.
- Cut a piece about 15 cm long, ensuring it has at least two buds for future growth.
Step 3: Preparing the Stem

Prepare the cutting as follows:
- Remove the leaves at the base of the stem.
- Keep only the leaves at the top.
- Dip the base of the cutting in rooting hormone powder.
Another option is to soak pieces of willow twigs overnight in water to create a natural rooting hormone solution.
Step 4: Planting the Cutting
Now it’s time to plant:
- Make a hole 5-10 cm deep in the soil of the prepared pots.
- Place the cutting into the hole, ensuring the base is in contact with the soil and the leaves are above the surface.
- Gently press down around the cutting to keep it upright.
- Water the cutting thoroughly.
- Cover the pot with plastic wrap to maintain a humid atmosphere.
- Place the pot in a warm location, away from direct sunlight to prevent leaf burn.
Step 5: Maintenance

Finally, proper maintenance is key:
- Water regularly to keep the soil and atmosphere humid.
- Protect the cutting until the following spring, allowing it to develop roots.
- Once the weather improves, you can leave your cutting outside, preferably in the shade, while continuing to water regularly. Keep the plastic wrap on until it’s well-established.
By following these steps, you can successfully take and nurture clematis cuttings, expanding your beautiful garden!