Chickpeas, native to the Middle East, are a protein-rich legume that thrives in Mediterranean climates. These drought-resistant plants not only produce highly nutritious grains but also have practical uses, from making flour to preparing bread and pasta. If you’re wondering how to grow chickpeas and when is the best time to plant them, we’ve got you covered. Read on to discover everything you need to know!

When and How to Plant Chickpeas?
Chickpeas are a versatile and resilient crop that grow well in dry, poor soils. They are particularly suited to arid regions where irrigation systems are minimal. Chickpeas can thrive in tough climates and are highly resistant to many pests and diseases. The only condition they are sensitive to is wet soil, so proper drainage is key. Here’s all you need to know about planting chickpeas for a bountiful harvest!
When to Plant Chickpeas?

Chickpeas prefer hot and dry climates, making them perfect for spring planting. The best time to plant chickpeas is in late spring, after the frosts have passed and the soil temperature has warmed to at least 10°C. This ensures a healthy start for your chickpeas, which are very sensitive to cold.
Chickpeas are often planted under olive trees, taking advantage of unused space, but they can also be planted beneath other trees as long as they receive enough sunlight. However, make sure you have enough space for your chickpeas to grow—these plants require ample room for a good harvest.
How to Plant Chickpeas?
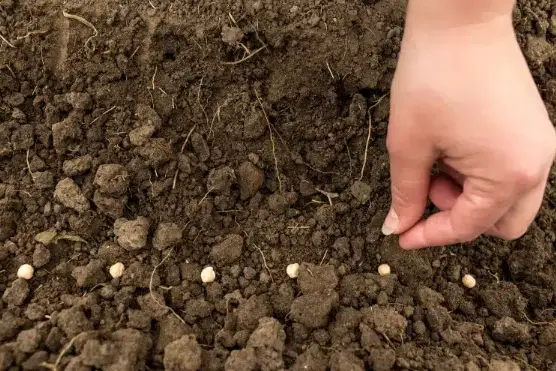
Planting chickpeas is relatively simple, but preparation is key for a successful crop. Here’s how to go about it:
- Prepare the Soil: Before planting, weed, aerate, and fertilize your soil. Chickpeas thrive in well-drained, slightly alkaline soil, so ensure that the growing area meets these requirements.
- Choose the Right Spot: Make sure to plant your chickpeas in a sunny location. This will help them grow strong and healthy, maximizing the nutritional benefits of your crop.
- Sow the Seeds: Plant your chickpeas by burying the seeds about 2 cm deep in soil with little to no organic matter. Plant the seeds in tight rows, spaced about 20 cm apart.
- Germination: If all goes well, germination should take place within 2-3 weeks. You will see green compound leaves begin to emerge, and the plant should grow to about 50 cm in height.
- Maintenance: Good news! Chickpeas do not require much maintenance once planted. They are drought-tolerant and do not need regular watering. In fact, the plant cover will help keep weeds at bay.
- Flowering and Pods: Chickpeas will begin to flower in early summer, producing solitary papilionaceous flowers. By the end of July, the pods will start out green and gradually dry as the plant completes its cycle.
When to Harvest Chickpeas?

Harvesting chickpeas is a manual process that requires patience. Here’s how to do it:
- Wait for Dryness: Chickpeas are ready for harvest when the plants are completely dry, marking the end of their growth cycle.
- Cut the Plants: Start by cutting the plants at ground level.
- Separate the Pods: Once the plants are cut, they will need to be beaten to break open the pods. The wind will help separate the grains from the pods, making the process a bit easier.
- Dry the Seeds: Finally, ensure the seeds are stored in a dry place to avoid any moisture, which could lead to mold or spoilage.
Growing chickpeas is a rewarding process that provides nutritious and versatile grains. By following the right planting steps and choosing the optimal time, you can enjoy a successful harvest that will last through the winter. Whether you’re using your chickpeas to make flour, bread, or pasta, this legume is a great addition to your garden!